- Furniture
- Sofas & Loveseats
- Accent Chairs
- Recliners
- Massage Chairs
- Coffee Tables
- End & Side Tables
- Ottomans
- Entertainment Centers & TV Stands
- Cabinets & Chests
- Beds & Bed Frames
- Mattresses
- Nightstands
- Dressers & Chests
- Armoires & Wardrobes
- Makeup Vanities
- Jewelry Armoires
- Clothing & Closet Storage
- Bedding
- Dining Room Sets
- Dining Tables
- Dining Chairs
- Bar Tables
- Bar Stools
- Kitchen Islands & Carts
- Sideboards, Cabinets & Buffets

- Outdoor
- Patio Conversation Sets
- Outdoor Sectionals
- Patio Dining Sets
- Patio Dining Chairs
- Patio Tables
- Patio Bar Furniture
- Patio Rocking Chairs & Gliders
- Adirondack Chairs
- Outdoor Benches
- Porch Swings
- Hammocks
- Outdoor Chaise Lounges
- Beach & Lawn Chairs
- Outdoor Furniture Accessories
- Raised Garden Beds
- Plant Stands
- Plant Supports
- Potting Benches & Tables
- Greenhouses
- Grow Tents
- Garden Tools
- Sheds & Outdoor Storage
- Carports
- Garages
- Camping Furniture
- Tents
- Coolers
- Air Mattresses & Sleeping Bags

- Kitchen
- Appliances
- Decor
- Bath
- Baby & Kids
- Toys & Hobbies
- Sports
- Pets
- Health & Beauty
- Sales & Deals


- LIVE


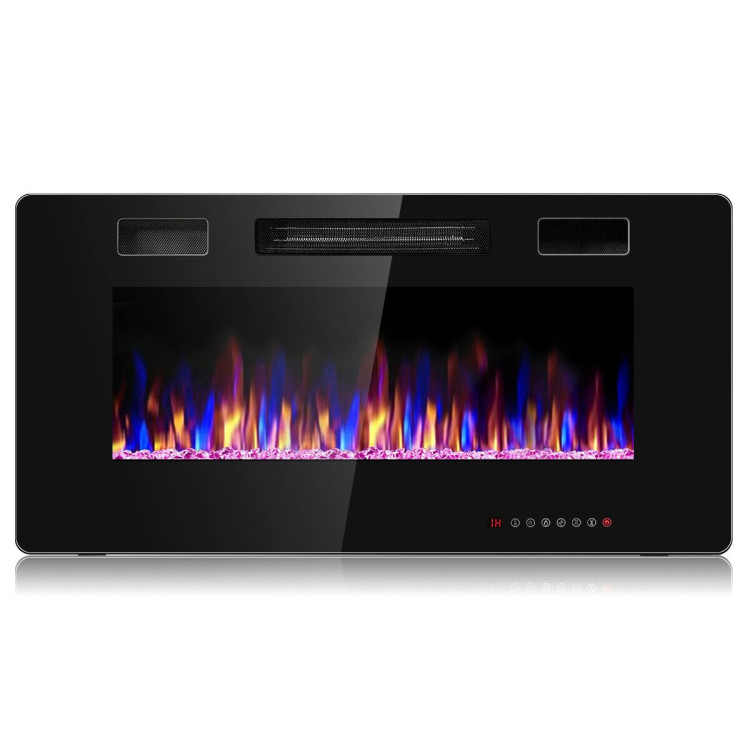


36 Inch Ultra Thin Wall Mounted Electric Fireplace
4.8
68 ReviewsItem No: 79356042
 Log in for 229 PTS per Purchase.Log in
Free Shipping on All Orders365-Day Warranty30-day No Hassle Return
Exchange & Redeem in the shopping cart!

4pcs 18 x 18 Inches Square Throw Pillows
These 18 x 18 inches square throw pillows are perfect for adding comfort and style to your living space!
Overview
Reviews
Q&A
Manuals

Overview
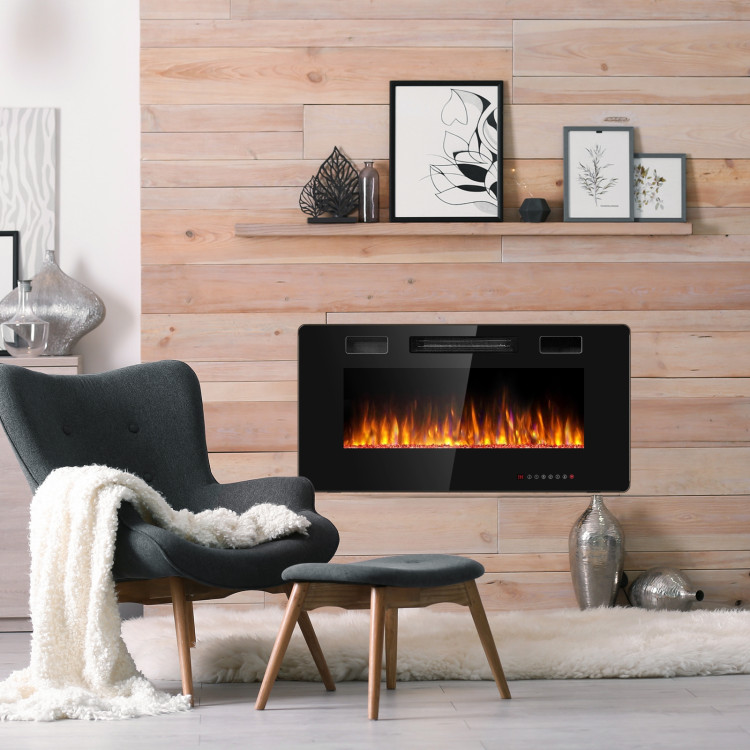
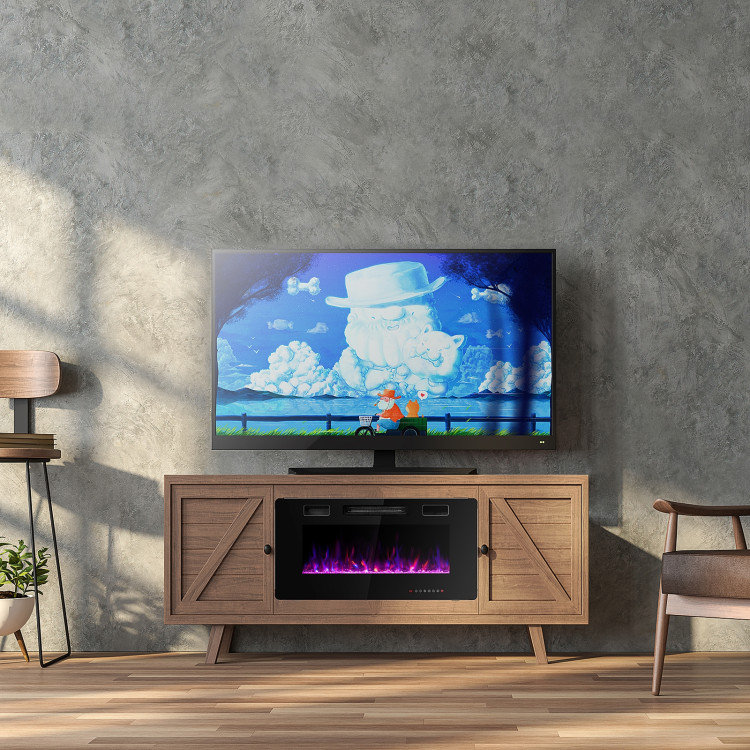
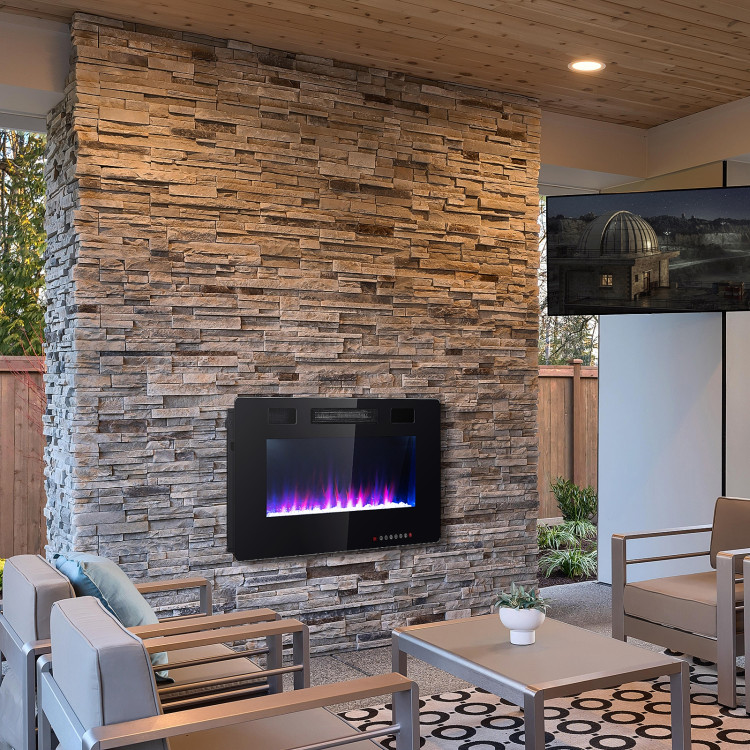
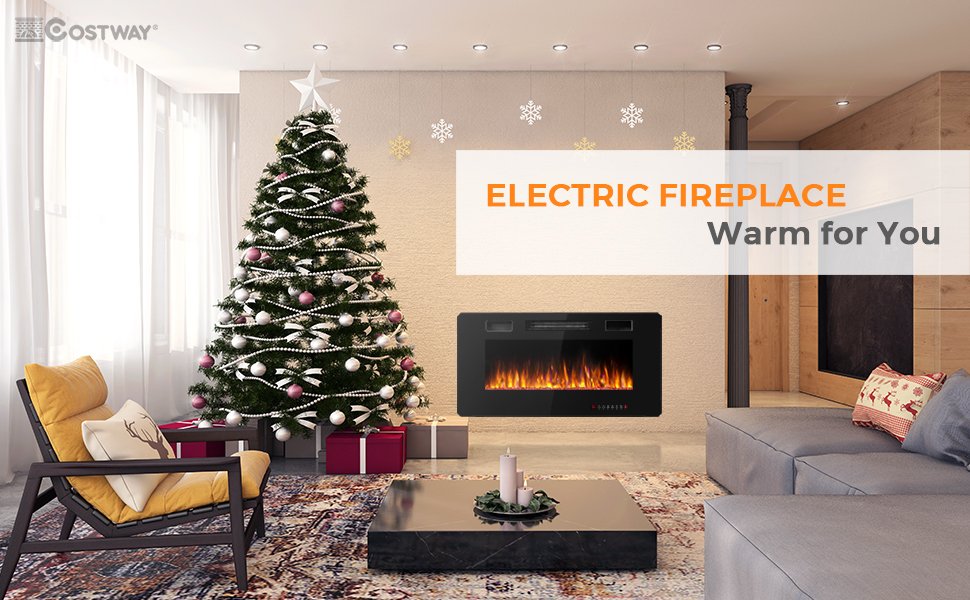
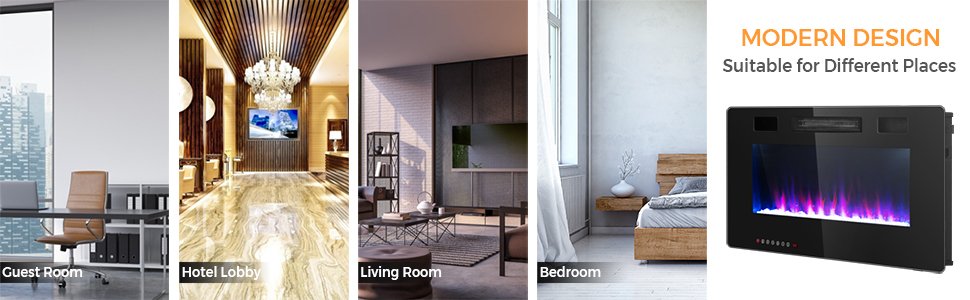
Combine with attractiveness and practicality, this 36 inch electric fireplace will enlighten your home.
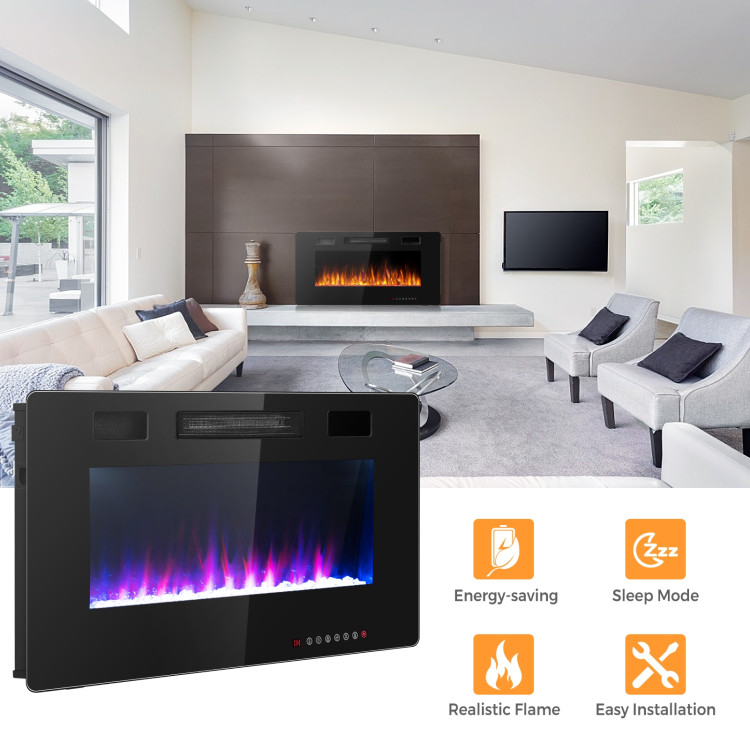
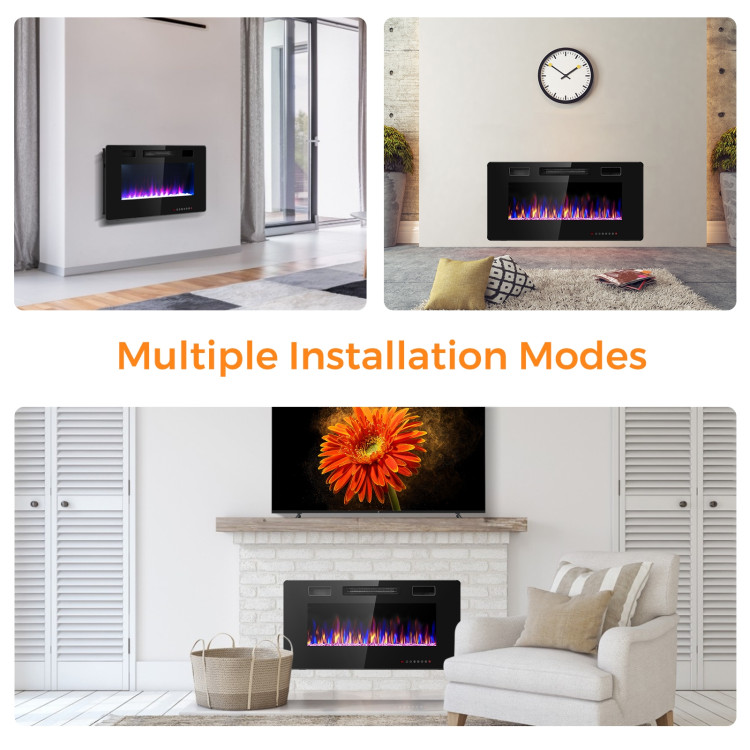
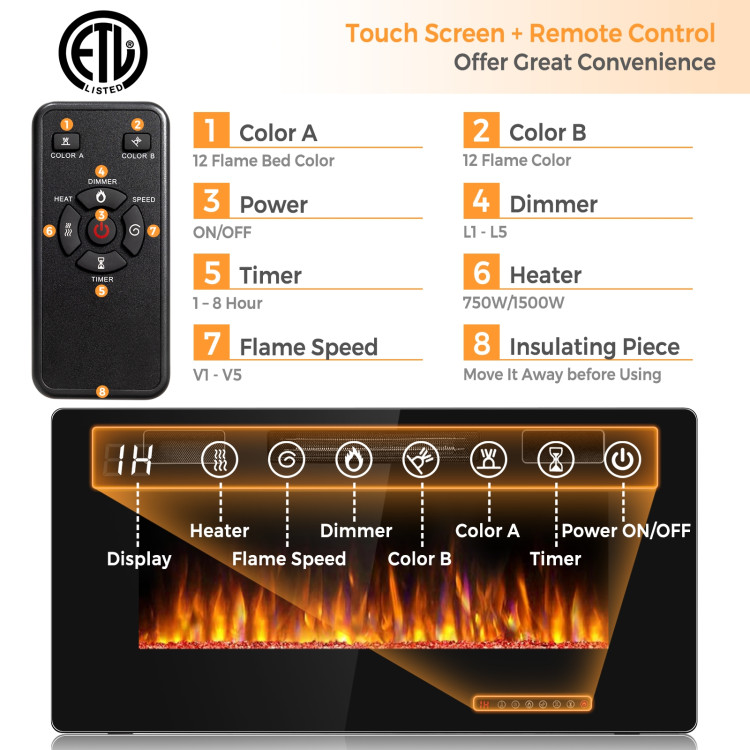
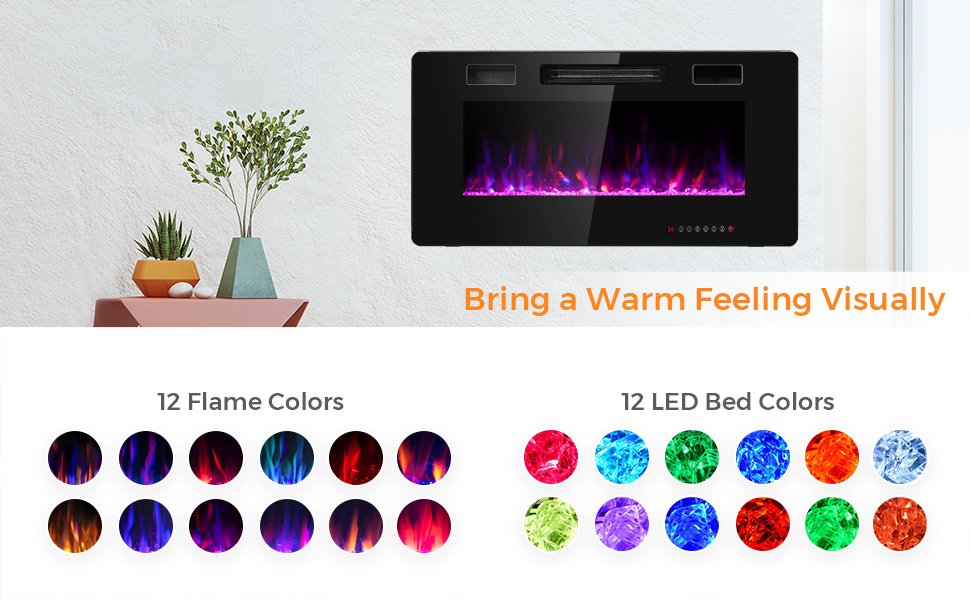
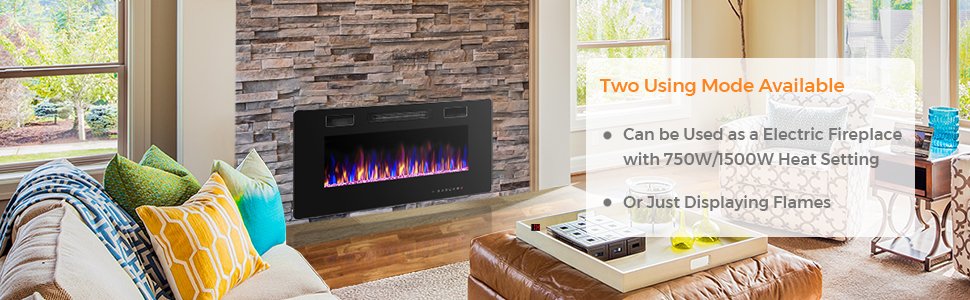
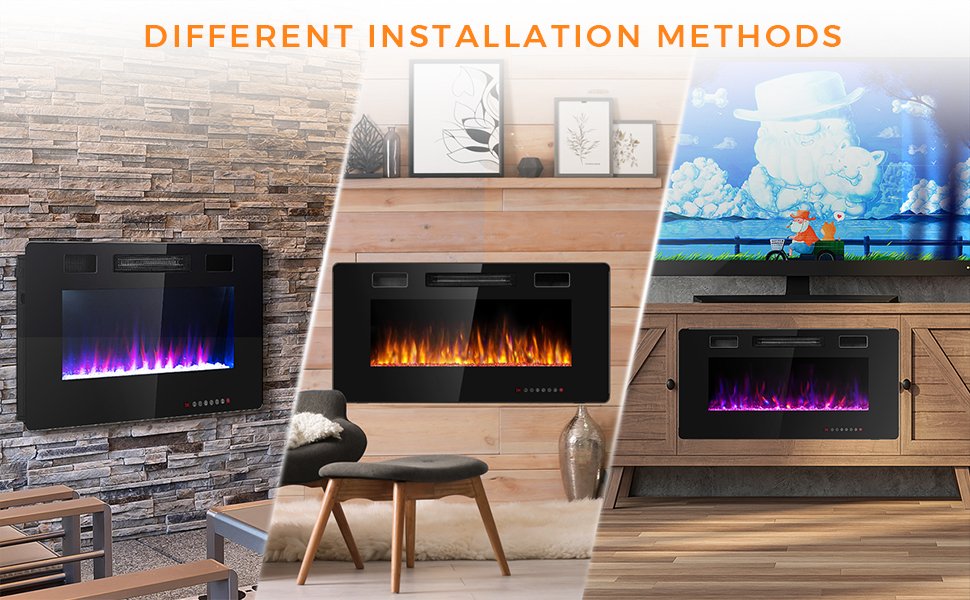
There are 2 install ways, wall mounted or insert, and both are space-saving and simple to install with thinner thickness. This electric fireplace comes with 2 heating settings--low temperature of 750 W and high temperature of 1500 W. More, this electric fireplace heater simulates real flame with 12 flamer colors and bed colors to create a cozy atmosphere as well traditional fireplace. While with 5 flame brightness settings ranging from dim glow to full glow, allowing you to adjust the flame to the brightness you want. The addition of remote control with the panel gives the comfort of operating and changing the settings of the heater from our couch or bed. More importantly, ETL certification and overheat protection ensure safety. This elegant black glass fireplace with timer adds a modern touch and an ideal touch to your home.
If you are looking for this product, don't hesitate to place an order!
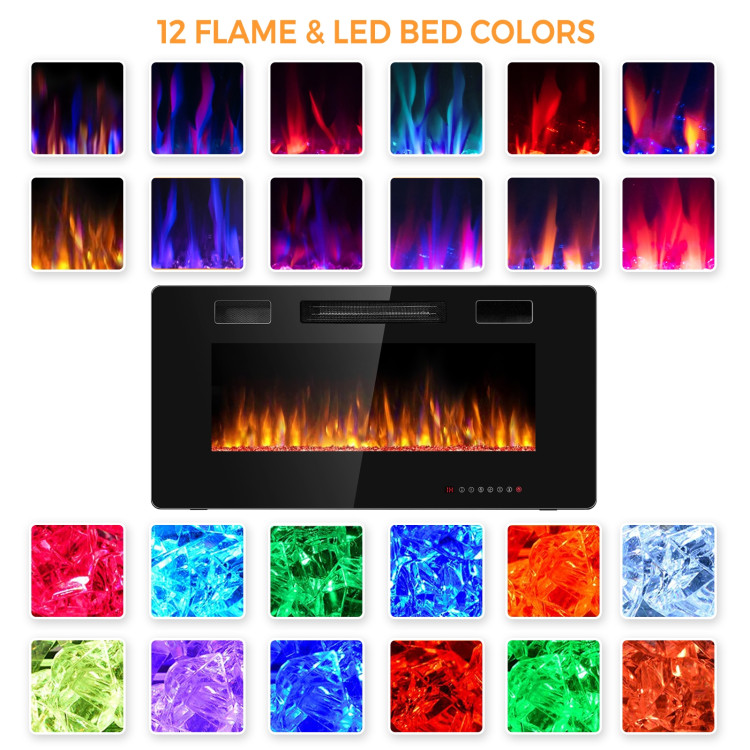
- 12 flame colors and 12 bed colors to choose
- 5 settings of brightness of bed and flame color
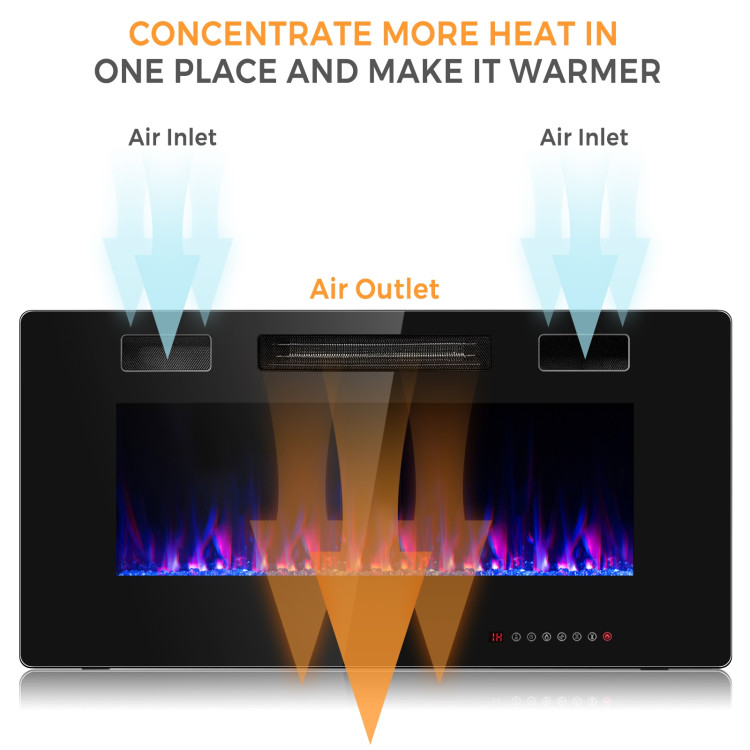
- 750W/1500W heat setting options with front air vent
- Delicate crystal decoration reflects light giving stunning look
- Remote control with battery adds convenient usage
- High quality touch screen with clear LED display
- Built-in timing function can set the time from1 to 8 hours
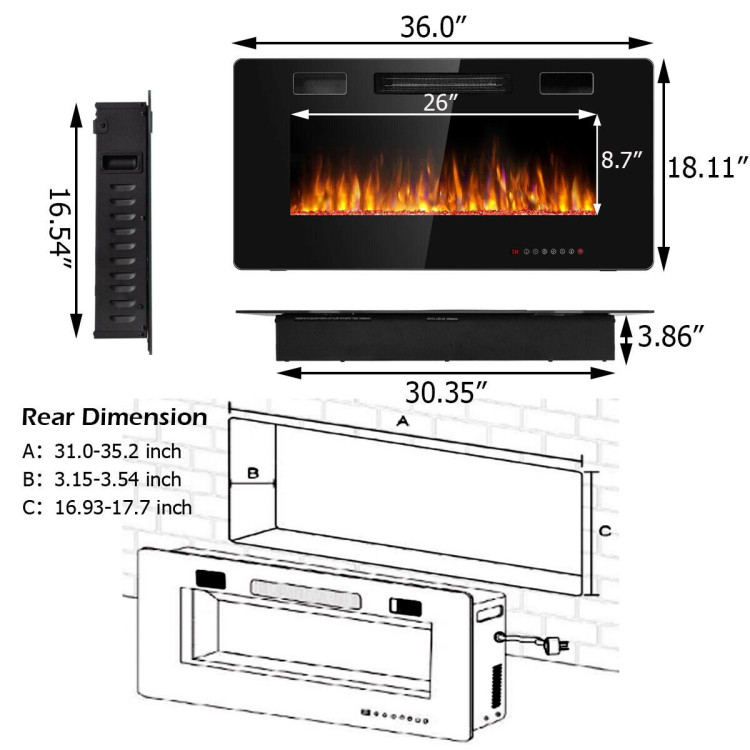
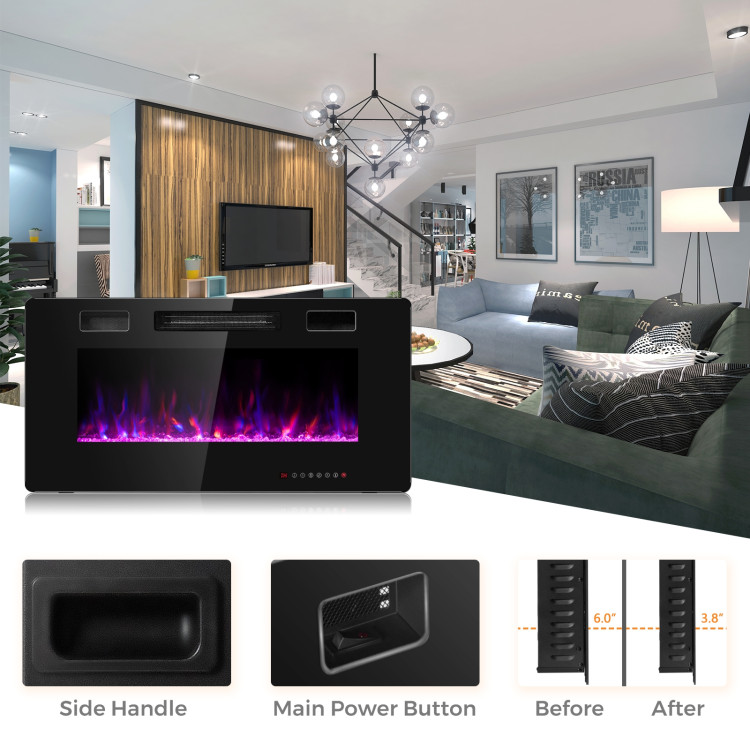
- Wall-mounted or insert to install, space-saving and simple
- No dust and other harmful gases produced by the fireplace
- Overheat protection device, automatically cut off when the temperature is too high
- ETL certification ensures long time services and user's safety
Reviews
4.8
68 Reviews5
4
3
2
1
Frequent Mentions
- M
Picture Perfect
It fits perfectly on my wall under the mantel I put up. It was easy enough to install myself. Now looking for a smaller version for my bedroom.
Preview - B
Nice addition to the living room. Not much heat. Got a noisy one though.
Bought it for my wife for Christmas. It was for the ambiance not the heat. As a heater, it did work, but doesn't put out a ton of heat. Think smaller room here. It's not going to heat a larger room (or one with high ceilings). I had no issues with the remote (obviously, remove the plastic tab that keeps the battery disconnected during shipping). The color configuration is easy via the remote. But it's sure easy to accidentally change the color, then you have to tap through all the colors to get back to the one you wanted. Overall, the "flames" look pretty nice. My wife had no issue with the "crystals" - similar to the glass chunks you'd see on many of the gas fireplaces. The only issues I had is that the LEDs on the front panel didn't work (the touch still worked), but the remote did just fine. My wife actually prefers the lights being out. Also, after a day's usage, it started "ticking", making a constant click that spend up when you spend up the "flames" or slowed down if you slowed them down. Overall, nice addition to our living room to help make it "cozy". Installation was straightforward. I did a on-wall mount for the time being until I have time to cut out and frame the wall for the in-wall mount. Remove the screw on the left side of the glass that holds the glass on. Mine was marked with a small sticker that had an arrow on it. There are hooks on both sides of the glass, so if you want to swing it out (on-wall mount) or lift it out completely (in-wall mount), gently lift the glass and either swing it out, leaving the right hooks still engaged and lower it or it'll lift out completely. If you are removing the glass assembly, clip the cable tie that holds the cable to the front panel and detach the cable. In lieu of sending it back (now that it was mounted), I decided to investigate what was causing the noise. The 12V 28BYJ-48 stepper motor that drives the "flames" bar had some internal gear noise that was amplified by the metal case. This is a fairly easy replacement, but will require a bit of patience. If you're interested, read on... 1. Unplug the unit and completely remove the front glass assembly. 2. Remove the 4 screws at the top of the plastic screen and the 2 screws at the bottom of the plastic screen. The lower metal tray has 4 screws holding it in. Two on each side of the tray. (see pic 1 & 2). 3. Carefully remove the metal tray. The plastic screen is mounted in a slot in the metal tray, so you'll need to wiggle the tray down to free the screen. Disconnect the wire assembly to the LED bars. Set that aside. 4. With the tray removed, you can gently pull down on the plastic screen to remove it from the upper track. There are tracks on the side as well, so once I got the screen down far enough, I flexed it to get it out of the side tracks. (One quick note about the screen - it's just a piece of smoke colored plastic with a film on the back. It's not really fragile, but it's easy to scuff. Plastic (plexi/acrylic) polish will fix that if it's an issue for you). 5. With the screen removed, loosen the hose clamp closest to the motor and slip it to the left to remove. (pic #3) 6. Locate the stepper motor (pic #4). Follow the motor's wires up to the control board. Disconnect from the control board. 7. This is the tedious part. Remove the two screws that hold the motor on. I used a close quarter mini bit ratchet with a #2 phillips bit (ARES 70040-1/4-Inch Drive Close Quarter Micro Bit Ratchet) to remove the screws. I did try an angled head screwdriver and an offset screwdriver, but I found the micro ratchet worked the best for me. 8. I replaced the motor with another 12V 28BYJ-48 stepper motor with a 22cm+ wire. (the 12V part and the wire length is important) - this should be 5 wire 4 phase. I tested the new stepper motor before reinstalling to make sure it worked correctly. I would rest the side of the motor on the metal frame to see simulate much noise it actually makes when in operation installed. 9, Reinstalling: I actually put thin rubber spacers in as a vibration dampener when I reinstalled the new stepper motor. Not sure if that actually helped much, but worth a shot when I had it apart. Make sure they are thin since the shaft (on mine) was so short. Also - the wires from the motor need to be at least 20-22cm. I got one with a 24cm wires, so plenty long. Replace the two screws holding the motor to the frame, route the wire back up to the control board and plug it back in. 9. Because the shaft on the new stepper motor (pic #5) that I purchased was so much shorter than the original, I purchased a metal 5mm to 5mm flexible coupling because the rubber tube with hose clamps set up kept falling off. Attach one side of the coupling to the installed stepper motor and insert the flame assembly in the other side and tighten the set screws. Check it in operation to make sure it rotates correctly. 10. After checking, reassemble. Insert the plastic panel into the side slots, then slide the plastic panel back into the upper slot. Hook up the wires to the LED bars and reinstall the bottom tray. Install all the screws, hook up the front panel controls and install the glass assembly. I don't think this was a common issue based on the reviews, but in lieu of shipping it back and getting another, and the fact that this one was installed, it was worth investigating. If yours is out of warranty or outside the return window, hopefully this helps. Replacing the stepper motor/coupler may fix the noise issue (noise with the heater off) or flames not moving anymore. It works great now and if you don't have any of the issues that I had, it was a worthwhile purchase for us. Even with the issues I experienced, it was an interesting project to fix. As far as the front panel LEDs not working, it doesn't matter to me, so I didn't bother investigating further than checking connections. (As a side note, you can access the control board from the back by removing the smaller panel on the back of the unit.
PreviewPreviewPreviewPreviewPreview - M
Nice quality, heavy, easy mounting and looks great.
I installed this on my boat in place of the led television. I like the modern look, ability to choose flame speed, color and brightness. It's a nice modern look. I took this well-built unit apart in order to only use one of the heater elements. Running on high produces a high temperature that would be hazardous if bumped into on the boat. This was easily modified to have the heater and fan controlled by a wall mounted thermostat and the rest of the functions controlled by the power switch and front controls. It came with a schematic diagram which made the modification simple. I highly recommend this electric fireplace heater.
- I
Like it. A lot!
Its ultra-thin profile is perfect for it fitting in my mantlepiece. I used peel and stick wallpaper to blacken the rest of the wall in my opening. Really happy with the way it all turned out. Gotta say it's kinda fun experimenting with the different color options. (Prior to ordering I thought it seemed silly to have all those choices!)
- A
It is very pleasant to use with all settings.
Just an all around great product!
Q&A
- Q:Does it come with legs? Can it be free standing?A:No, it is a wall-mounted electric fireplace.
Costway representative - Q:Is wall mount included?A:Yes, it is included.
Costway representative - Q:How do I turn the heat completely off, while keeping the flames on? Ours seems to have 3 settings - low, high and “OFl, but the heat lamp (top middle) seems to be on regardless of the setting.A:Setting it to OFF means that the heating is turned off. The light at the air outlet is due to the reflection of the bottom flame light. Generally, in relatively dark conditions, the light is clearly visible at the air outlet, which is not related to heating.
Costway representative - Q:Can this be inserted into a regular fireplace opening?A:Here is the suitable opening size, length within 31-35.2 inch, width within 16.93-17.7 inch , deepth within 3.15-3.54 inch.
Costway representative - Q:The flames aren't as bright as advertised.A:The light get affected by the surrounding environment in fact. If the surrounding environment is dim, the light will look brighter. Can you use it a dim condition? .
Costway representative - Q:Posting this question a second time. Should the flames look like little square boxes floating up or do they really look like flames ?A:Please forward your question or concern as well as the order number to our customer support at [email protected]. After order confirmation, our customer support are standing by and ready to help you resolve any issues you may have.
Costway representative - Q:Installed our unit but the "flames" resemble small square blocks and not "flames". Ran it for a while to see if maybe it was just because it was new but it still doesn't look anything like the pics. Am I missing something?A:Please forward your question or concern as well as the order number to our customer support at [email protected]. After order confirmation, our customer support are standing by and ready to help you resolve any issues you may have.
Costway representative - Q:Do you have to cut the wall to mount it?A:No, it can be wal-mounted.
Costway representativeQ:So does it come with a wall mounting bracket? - Q:What kind of glass is the fireplace? Is it tampur glass?A:Yes, it is made of tempered glass.
Costway representative - Q:is it ventless?A:This fireplace is designed with three holes, with left and right holes for air inlet and middle holes for air outlet.
Costway representative
See More
Manuals
Related Products To This Item
 Added to
 Frequently Bought Together


5%